

Fitting an Expedition rig.
How to fit the mast foot and mast thwart for an Expedition rig into an open canoe.


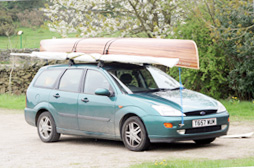
There are many different open canoes and people use them in many ways. For most people with a 2 person canoe the best place to put the mast is just behind the front seat, or behind the front buoyancy bag in the bow of the canoe. Where to put the rig depends on many factors and if you are unsure where to put yours then please contact us and we can advise. Place the mast thwart on top of the gunwales and check that it doesn't interfere with the front person. Make sure that the hole is central and that the thwart is square across the canoe.
Mark the position on the gunwale with strips of masking tape. Measure the underneath width of the inner gunwale and mark this on each end of the thwart, with the angle correct. This is where to cut the thwart so that it fits tight against the hull skin when placed under the gunwale. Check again and then cut off the ends of the thwart. If the canoe has tumbleholme then allow this angle on the cut and dont cut it too short.
Measure where the existing thwart fastenings are from the edge of the gunwale and mark this on the gunwale where the thwart is. Measure the centre of the thwart and mark the positions for a fixing hole. Again check, to see that it is correct.
Clamp the thwart in place and drill a 5mm hole though the gunwale and the thwart at each end. Make sure that the drill does not lean into the canoe at the top, or you may miss the end of the thwart underneath.
Bolt the thwart onto the gunwales.
Stand the mast through the thwart and into the mast step. Check that the mast is vertical, either by using a square off the thwart or using a level (having levelled the boat first).
Check that the mast is vertical in a fore and aft direction by squaring off a piece of wood resting on the thwart and the centre yoke. Sight down from the thwart and make sure that the foot is square across the boat.
Mark the position of the mast foot with masking tape. Check the position and that the mast is still vertical. Stand back and see that the mast looks vertical and square off the boat. You can use the halyard tied off to the thwart and pulled down tight into the cleat to put a clamping pressure on the mast foot. This will be used later to sqeeze excess glue out of the joint to make sure that you get a good bond.
Remove the mast and foot. Place a piece of coarse sandpaper along the centreline where the mast foot goes. Draw some lines on the bottom of the mast foot with a pencil.
Place the mast foot the right way up on the sandpaper. Hold the sandpaper and rub the mast foot back and forwards along the centreline.
Keep checking the underneath surface and watch the pencil lines as they are sanded off. The mast foot will slowly start to conform with the bottom of the boat. Keep going until all the pencil marks are removed. Try and keep the mast foot level as you do the rubbing and try not to rock it forwards or back or it may end up rounded in the fore and aft direction.
You need to consider how you will hold the mast foot in place when it is being glued, as the glue acts like a lubricant and the foot will slide about. For a plastic boat with a soft thick bottom we use small pins just sticking out from the bottom of the mast foot. Turn the foot upside down on a firm surface and knock in a panel pin into each corner. Cut off the pins leaving about 2mm sticking up. Sharpen the pins with a file. If the pins are only 2mm protruding, there is no way that they will come through the bottom of the hull (which will be at least 8mm thick). Place the mast foot exactly in its position over the masking tape marks, and hammer the foot down until the pins have gone into the skin of the hull. Mark the foot with a bit of masking tape to make sure that you know which way around it goes and then remove it. With a hard thin surface like fibreglass you might try stretching long lengths of masking tape over the foot and attaching the ends to the hull skin, instead of the pins, to hold it in place.
We use G-Flex epoxy resin from West Systems for gluing the foot in. It has been specially formulated for sticking to plastics. Folow the gluing instructions to the letter. This involves careful preparation of the hull, degreasing with the alcohol wipes. abrading the surface and flaming the surface with a blowlamp. There is a video on west systems website showing you how do this. We get our epoxy from Robbins Timber from Bristol.
Mix up plenty of epoxy and coat the mast foot. Put on more than you think you might need. Let it soak in for several minutes. Put the mast foot in position and find the pin holes and push it into place. Stand the mast tube into the foot and tie off the halyard to the thwart. Pull the other end through the cleat and pull down tight to get a clamping pressure. The epoxy should slowly squeeze out onto the masking tape. Tap the corners of the foot with a hammer to make sure that the pins are home. The pins will stop the mast foot from sliding around on the glue and loosing its position. When the glue has finished oozing clean off the excess before it sets.
We also prefer to use 2 countersink bolts up through the bottom of the hull as a belt and braces approach, but recognise that many people will not want to do this. This bolt will make sure that the foot does not skid whilst the glue goes off, and if it is carefully countersunk, the head will be just shy of the surface. You could flush the surface with some G=Flex and you wouldn't know it was there, but it would make the mast foot twice as secure as glue alone.